READ/WATCH: Popping Out a Photo
This tutorial is about how to pop out part of a subject from a photograph. The effect is shown below: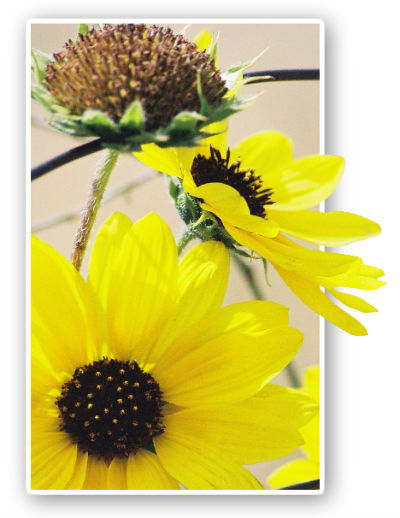
Here are the instructions for completing this tutorial:
Watch as the following screencast demonstrates how to complete this tutorial:
- Open the photo you want to use for the effect in Pixlr. Duplicate the background layer onto another layer, so that now you have 2 copies of the image on 2 different layers.
- Use the selection tool of your choice to select the part of the image that you would like to have "popped out" of the frame you are going to build.
- Once you have the subject of your photo selected, duplicated the background layer again. Go up to "Edit" and select the "inverse selection" so that everything on the new layer is selected except for your subject. Press "backspace" on your keyboard. Everything should now be deleted except for your subject that you want popped out.
- Click back onto the background layer that still has the entire image (the layer that you created in Step 1). Drag the square selection tool around the area of the background that you would like to remain visible. Make sure you include your subject in this square selection, and make sure part of your subject is hanging over the edge of your square. Go up to "Edit" and select the "inverse selection" so that everything is selected except for the square area of background. Press "backspace" on your keyboard. Now you should have the top layer as the popped out subject, the middle layer as the square background layer behind the subject, and a background layer as the original image. **The original background layer should not be visible, it is there only as a backup in case of mistakes.
- Click on the middle square area of background layer, and add a drop shadow effect and an outer glow effect from the layer effects options in the layers palette.
- Save your final image as a jpeg!
Watch as the following screencast demonstrates how to complete this tutorial:
Last modified: Sunday, January 23, 2011, 1:01 PM