Take the practice quiz made by Adobe.
ADOBE CERTIFIED ASSOCIATE
PHOTOSHOP CS5
Study Guide Sample Exam Items
LINEAR EXAMPLES
PS 1.1
Which images would be most appropriate when selecting images for a national health club chain
developing a marketing plan to increase enrollment?
A. images of healthy foods
B. images of athletic and toned models
C. images demonstrating fashion trends
D. street view images of the buildings at prominent locations
Correct Answer: B
PS 1.2
When is obtaining permission to use a copyrighted image NOT required?
A. when using images to develop design skills
B. when using images to promote a free event
C. when using images for a free public display
D. when creating images for educational institutions
Correct Answer: A
PS 1.3
Which three elements should be identified for every task on a project plan? (Choose three.)
A. cost
B. owner
C. software
D. due date
E. estimated hours
Correct Answer: BDE
PS 2.1
What resolution will the image(s) be saved at when using the Save for Web option?
A. 72 DPI
B. 96 DPI
C. 150 DPI
D. 300 DPI
Correct Answer: A
PS 2.2
Which two are related to the design principle of movement? (Choose two.)
A. focus
B. rhythm
C. harmony
D. symmetry
E. repetition
Correct Answer: BE
PS 2.4
Which three are best practices related to making color corrections with Photoshop? (Choose
three.)
A. work in CMYK mode
B. use adjustment layers
C. work with a calibrated and profiled monitor
D. downsample images to final resolution before color correction
E. touch up an image (remove dust spots, scratches, etc.) before making color corrections
Correct Answer: BCE
PS 2.5
What is one key feature to adjust when taking photos in environments with different lighting?
A. zoom
B. flash
C. resolution
D. megapixels
Correct Answer: B
PS 2.6
What is another term for raster graphics?
A. bitmap
B. line work
C. 3-D images
D. vector image
Correct Answer: A
PS 3.4
What is the most effective way to save snapshots of different versions of a graphic to show a client?
A. use Layer Comps
B. use Smart Filters
C. use Save As for different versions of the same graphic
D. export an animated GIF with the different versions of the graphic portrayed
Correct Answer: A
PS 3.5
Which menu option is selected to change the color mode of an image?
A. Color>Mode
B. Print>Mode
C. Image>Mode
D. Image>Color
Correct Answer: C
SIMULATION EXAMPLES
(right-click or command-click on Mac and save .jpg files on your computer to work on them)
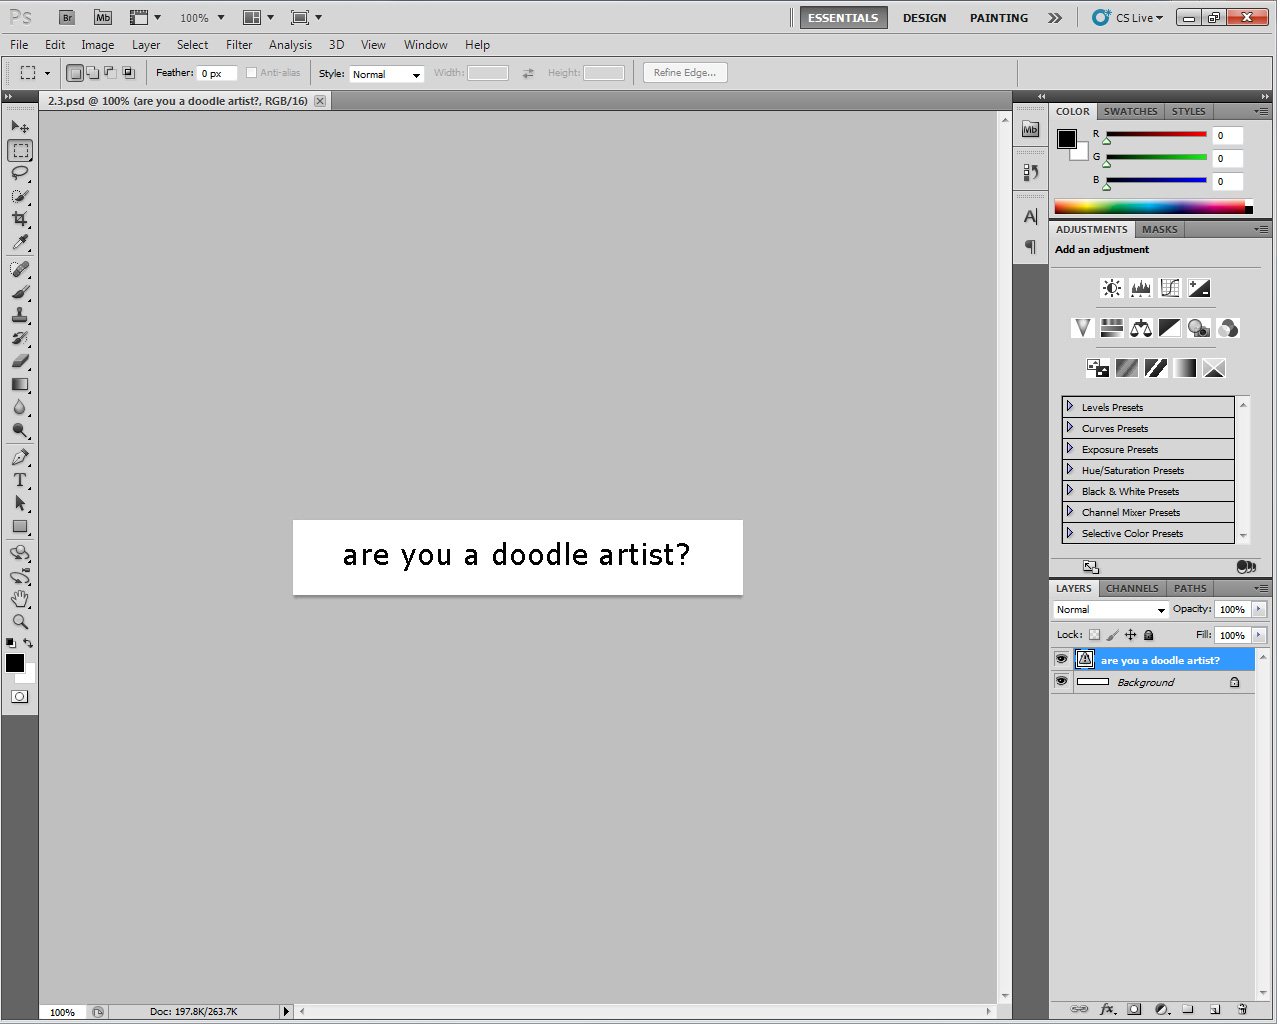
PS 2.3
Set the anti-aliasing for the text to Crisp.
Method of Completion:
1. Click Window > Character
2. Click the drop-down menu for Anti-aliasing and set it to Crisp
PS 3.1
Using the mini-bridge, browse for items on the Desktop. (Note: Do not open any files.)
Method of Completion:
1. Click Window > Extension > Minibridge
2. Click Desktop
3. Click Browse Files
4. Click Desktop
PS 3.2
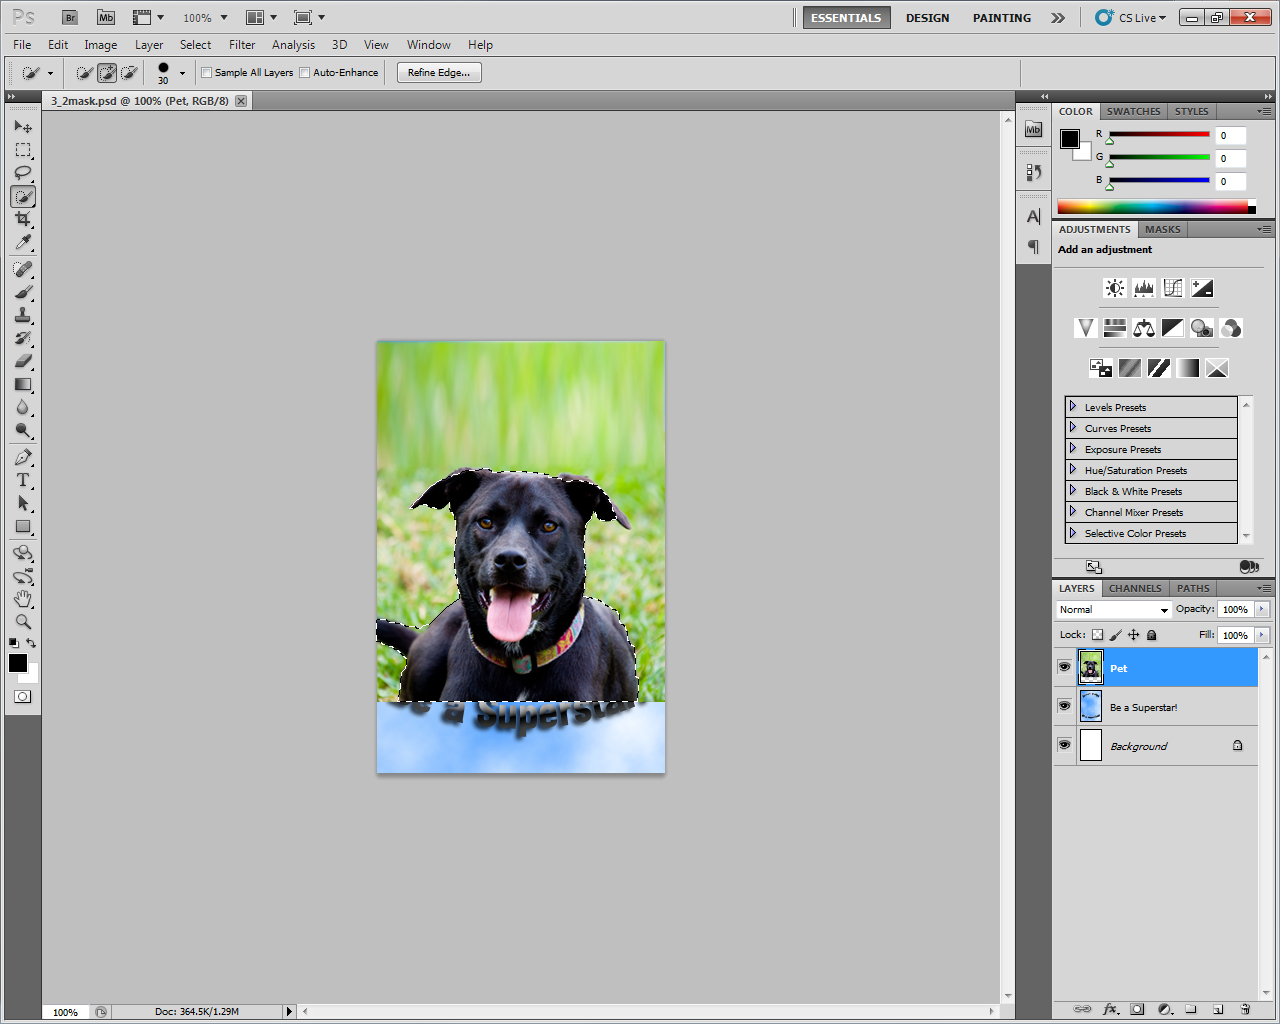
Create a mask using the selection on the layer named pet.
Method of Completion:
1. Click the layer named pet
2. Click Layer > Layer Mask > Reveal Selection
PS 3.3
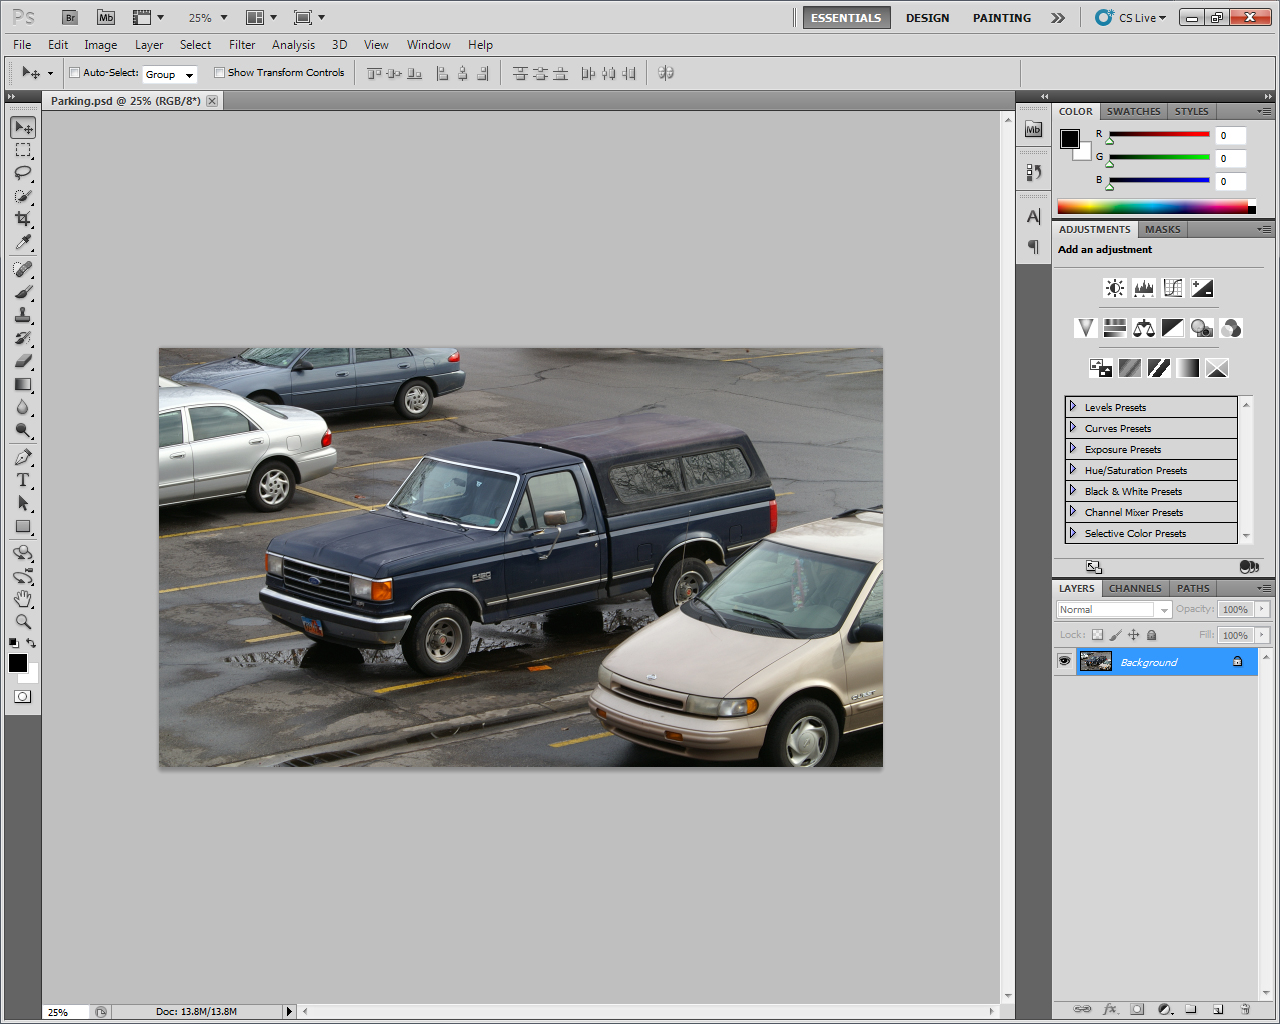
Convert the file to CMYK as a U.S. Sheetfed Coated v2 and then save it for print production as a TIFF with LZW compression, Per Channel Pixel Order and IBM PC Byte Order.
Method of Completion:
1. Click Edit > Convert to Profile
2. Click the drop-down for Destination Space and select U.S. Sheetfed Coated v2
3. Click OK
4. Click File > Save As
5. Click the dropdown for Format and select TIFF
6. Click Save
7. Click LZW
8. Click the Per Channel button and click OK
9. Click the IBM PC button
10. Click OK
PS 4.1
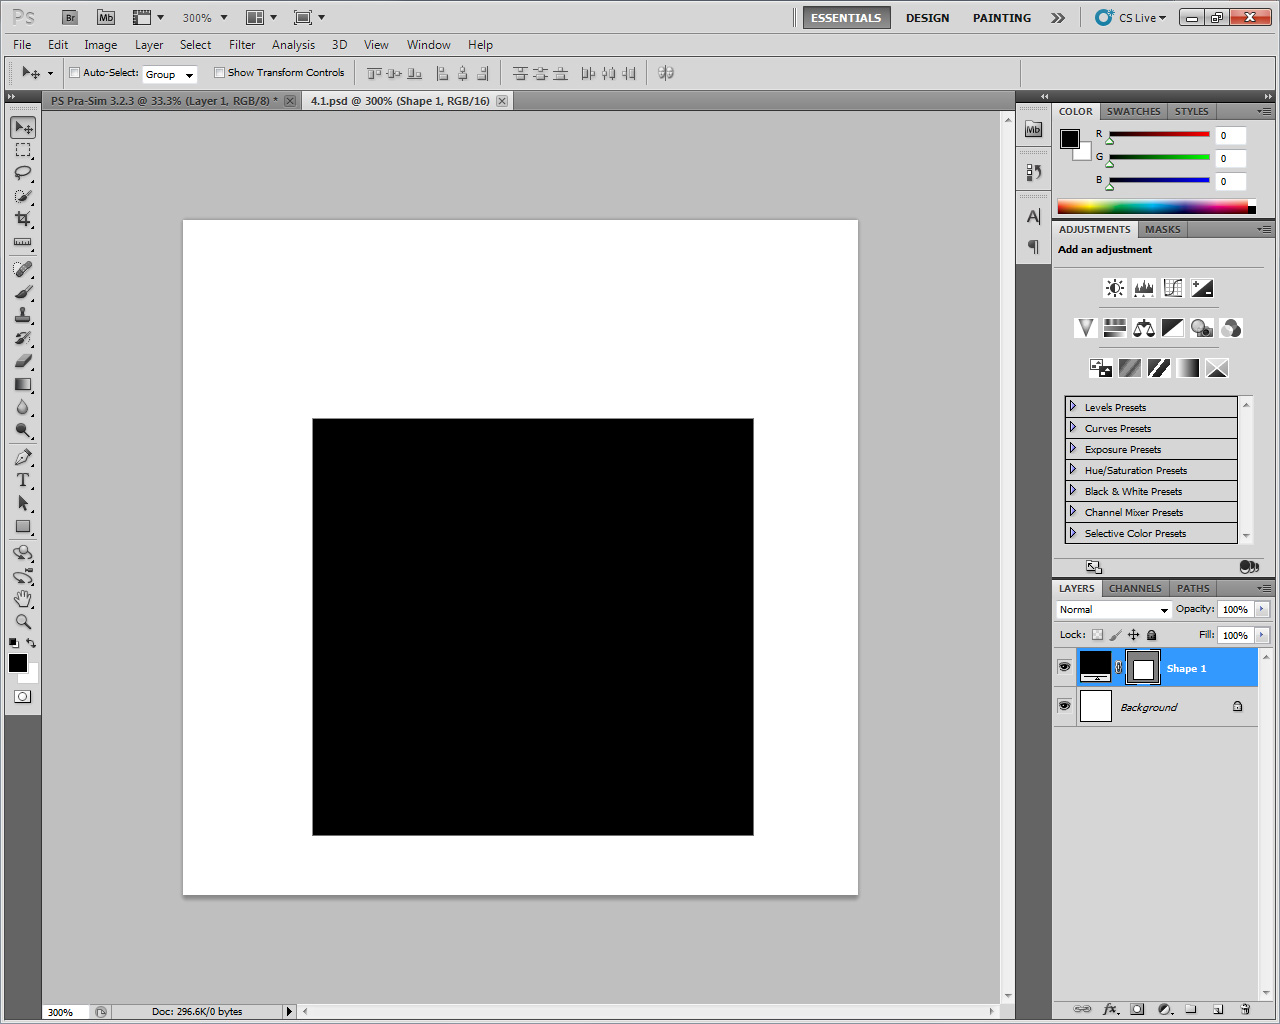
Record the measurement of the width of the square on the stage.
Method of Completion:
1. Click Analysis > Ruler Tool
2. Click and drag from edge to edge across the width of the square to measure
3. Click Window > Measurement Log
4. In the Measurement Log Panel click Record Measurements
PS 4.3
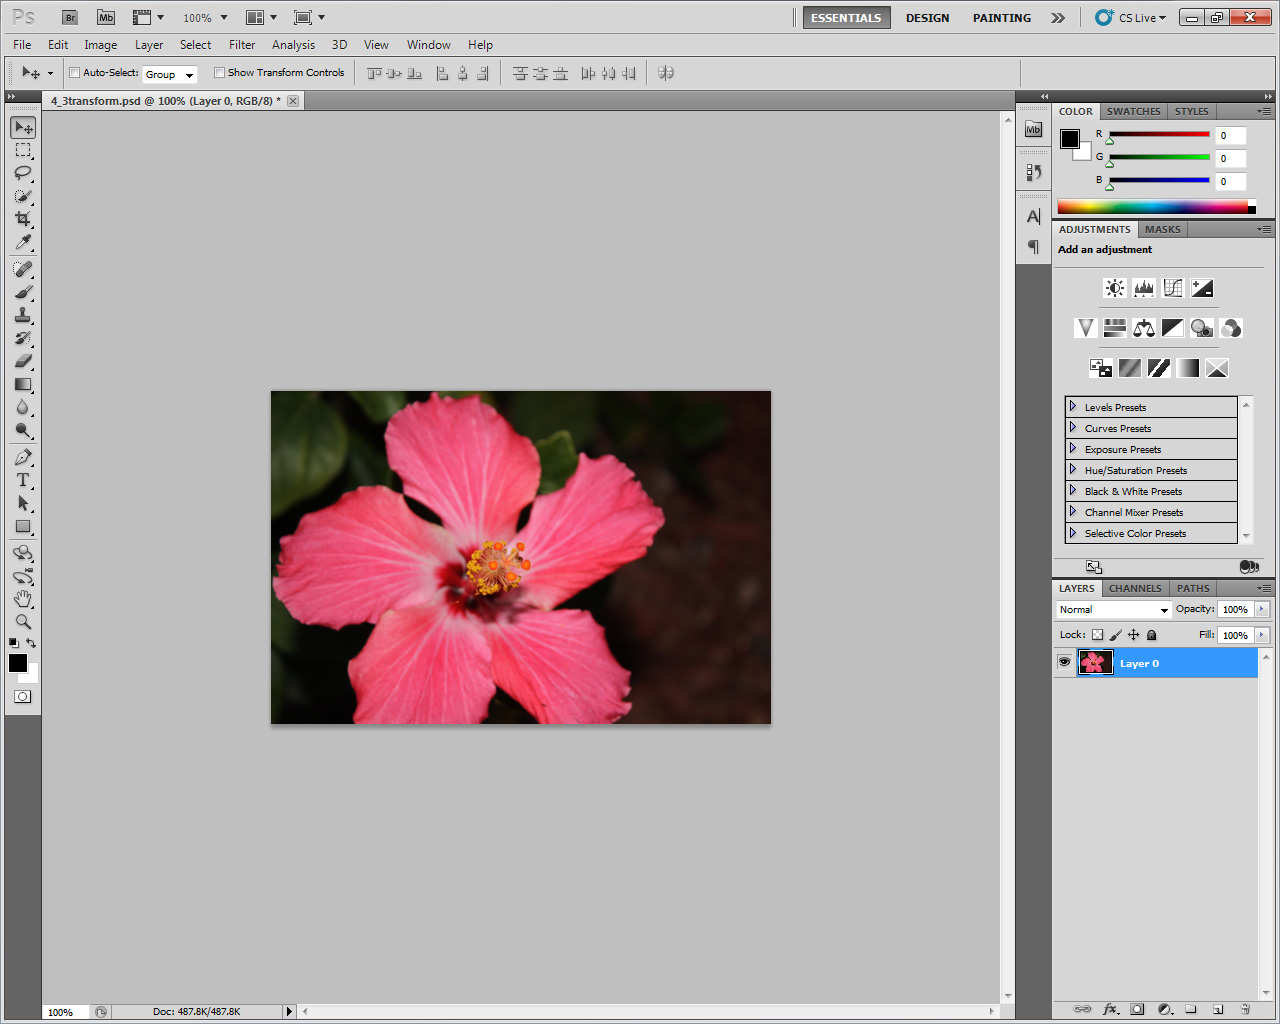
Apply HDR toning to the image using the Saturated Preset.
Method of Completion:
1. Click Image > Adjustments > HDR Toning
2. Click the Preset drop-down menu and select Saturated
3. Click OK
PS 4.4
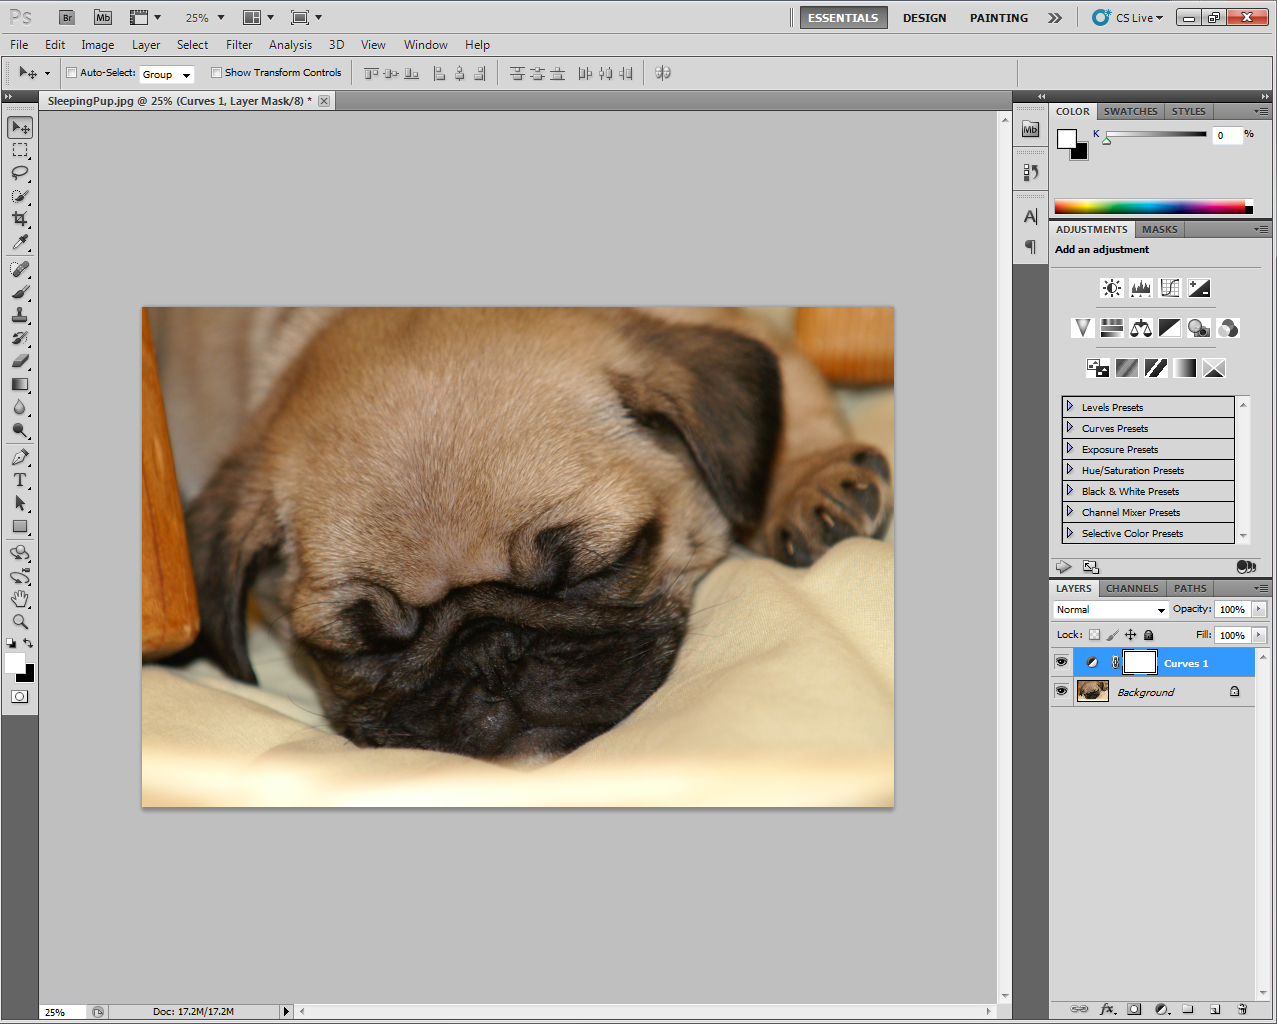
Increase the contrast of the image using non-destructive editing and the Curves Preset Medium Contrast (RGB).
Method of Completion:
1. In the Adjustments Panel, click the Curves Presets arrow to expand the Curves Presets list
2. Scroll down and click Medium Contrast (RGB)
PS 4.5
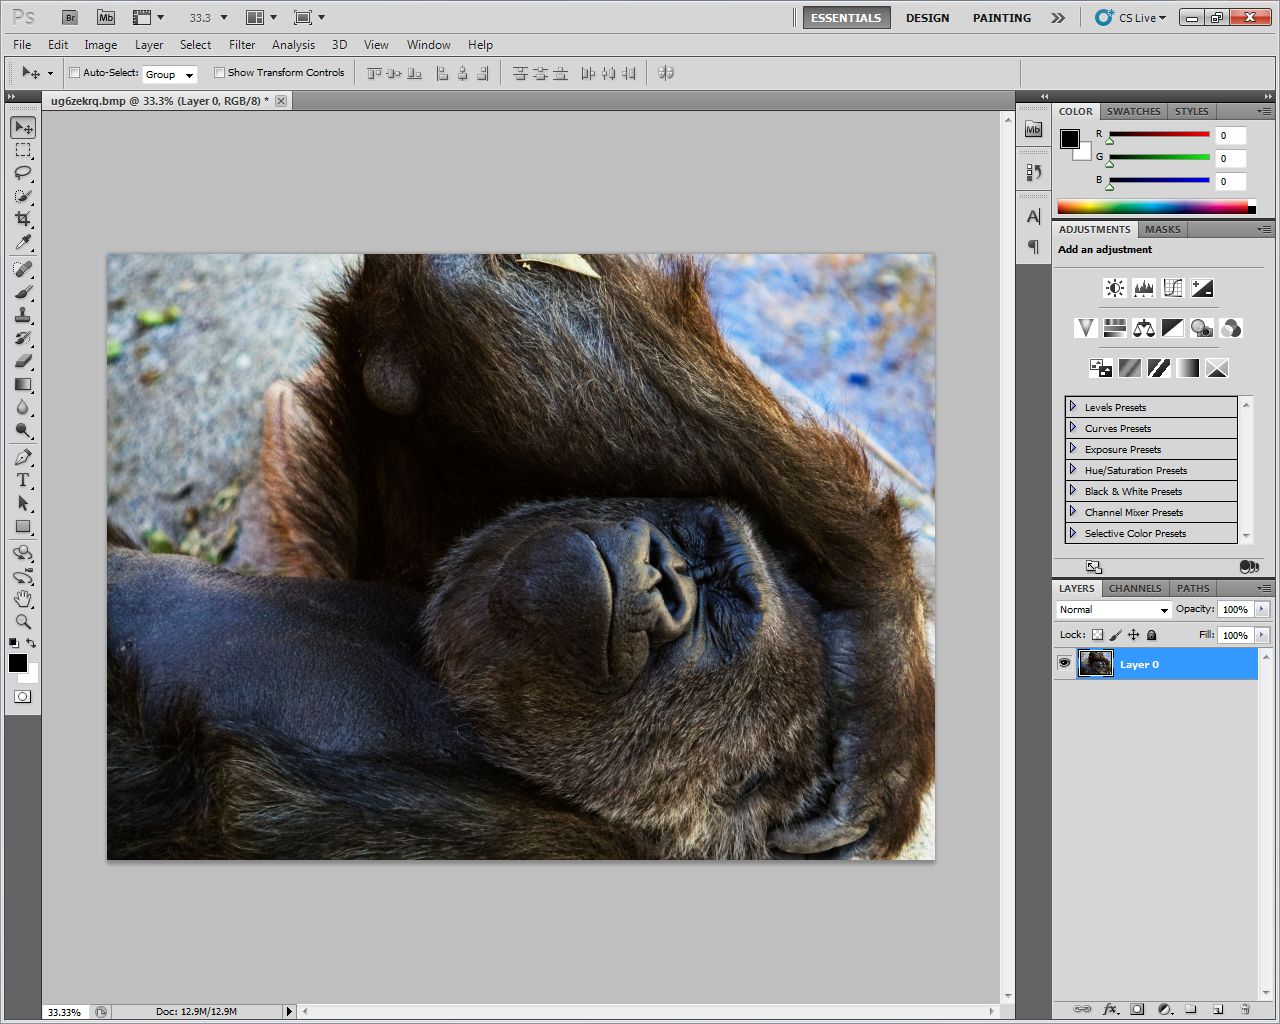
Duplicate the current layer, then set the new layer opacity to 60% and change it to a Hard Light Blending Mode.
Method of Completion:
1. Right-click the current layer and select Duplicate Layer
2. Click OK
3. Click in the Opacity text field and type 60%
4. Click the drop-down menu for Blending Mode and select Hard Light
PS 4.8
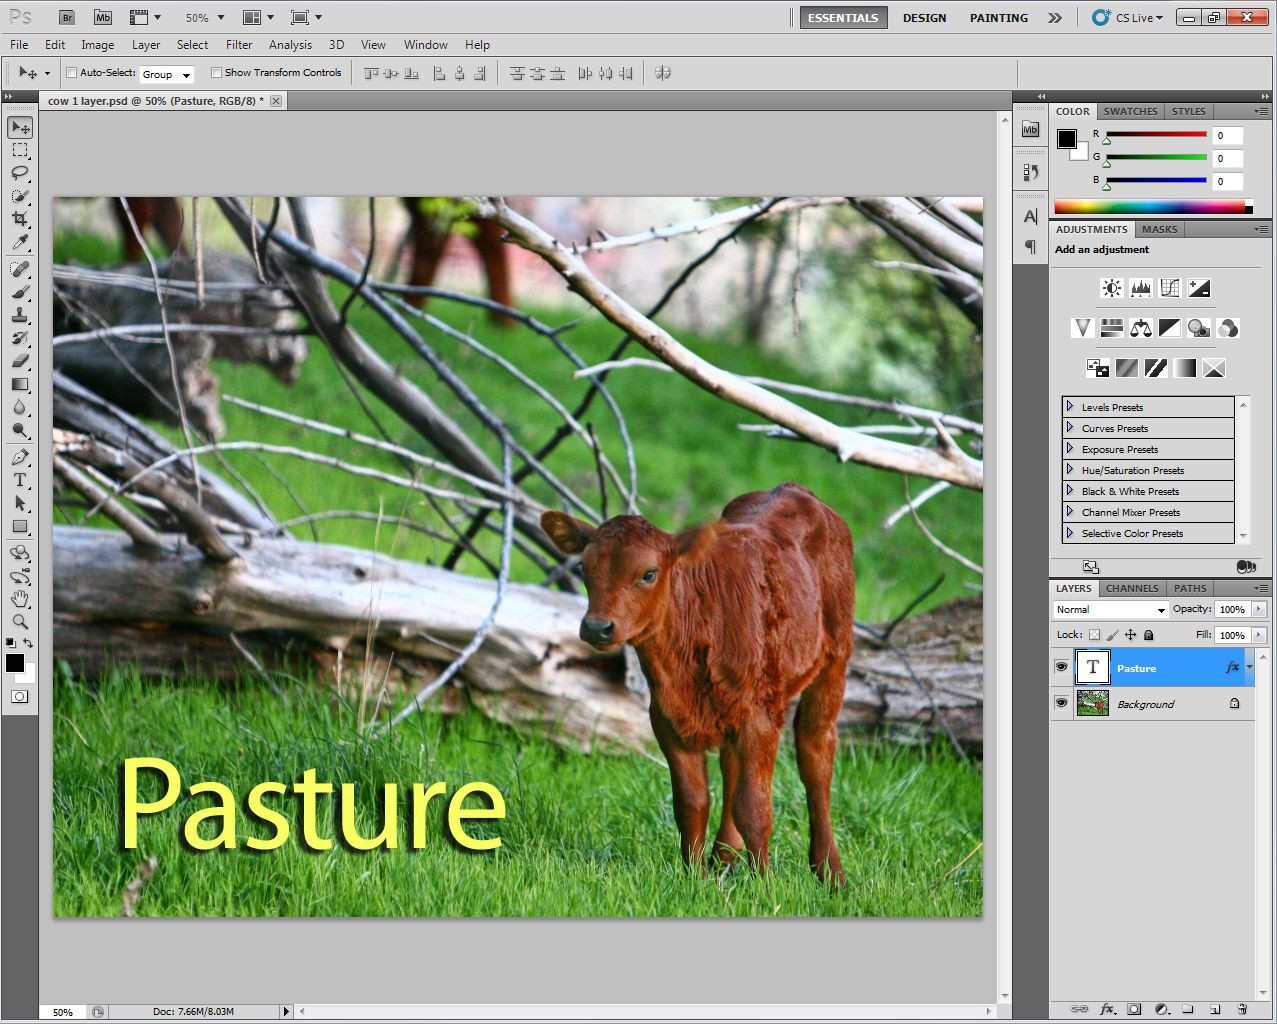
Remove the Drop Shadow style from the type layer named Pasture and then add the Bevel and Emboss style, setting the Size to 10 px and the Soften to 15 px. (Note: Accept all other default settings.)
Method of Completion:
1. Double-click the type layer named Pasture
2. In the Layer Style dialogue, uncheck Drop Shadow
3. Click the Bevels and Emboss style
4. Click and drag the Size slider to 10
5. Click and drag the Soften slider to 15
6. Click OK
PS 5.1
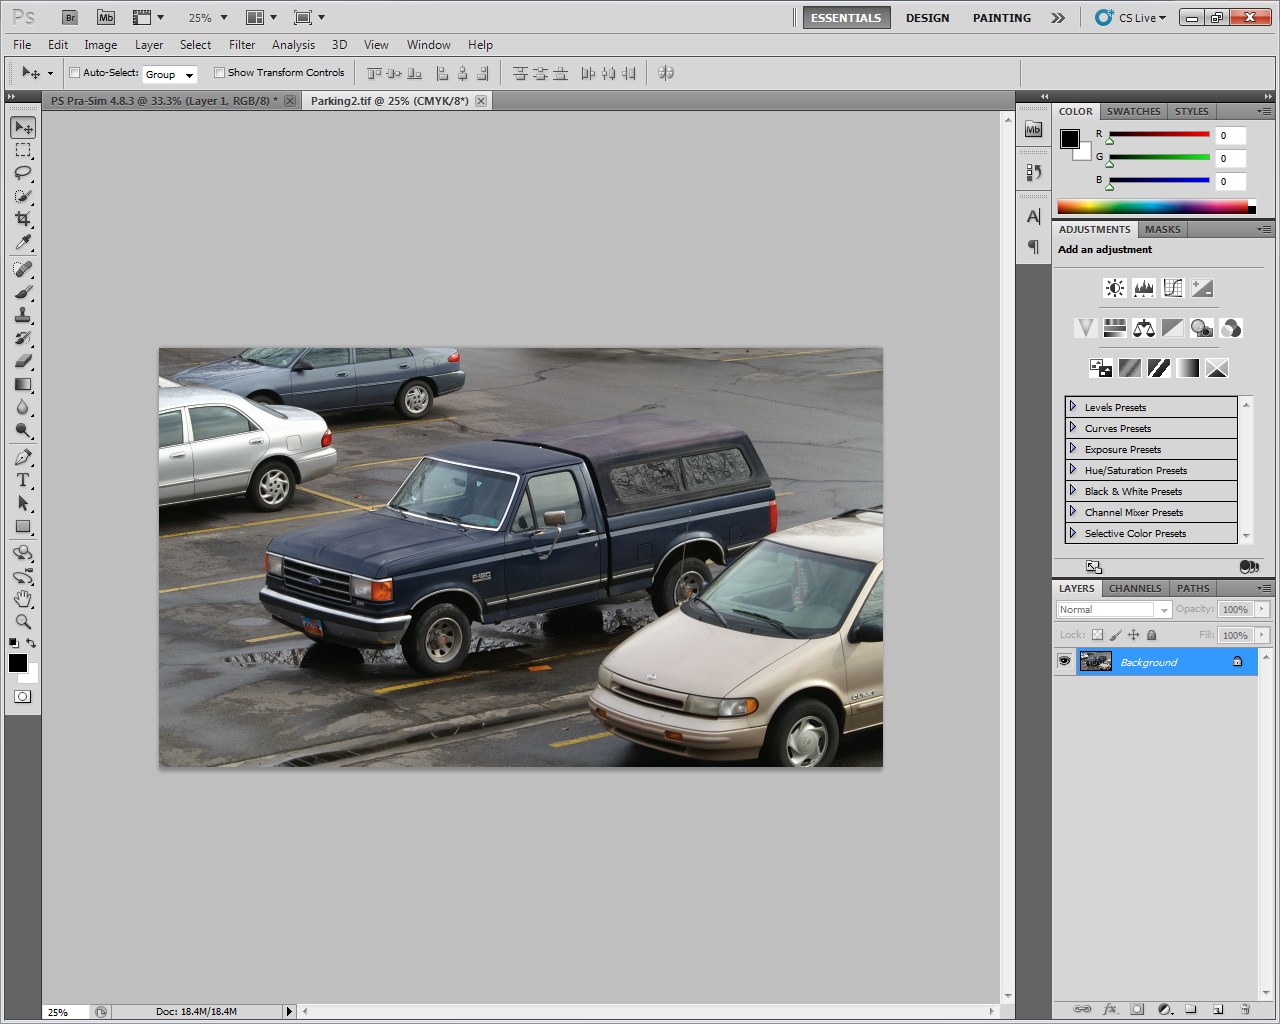
Resize the image, setting the width to 6 inches and the resolution to 200 pixels per inch. (Note: Accept all other default settings.)
Method of Completion:
1. Click Image > Image Size
2. Under Document Size, click the drop-down for units and select inches
3. Click in the text field for Width and Type 6
4. Click in the text field for Resolution and type 200
5. Click OK
ADOBE CERTIFIED ASSOCIATE
PHOTOSHOP CS5
Study Guide Sample Exam Items
LINEAR EXAMPLES
PS 1.1
Which images would be most appropriate when selecting images for a national health club chain
developing a marketing plan to increase enrollment?
A. images of healthy foods
B. images of athletic and toned models
C. images demonstrating fashion trends
D. street view images of the buildings at prominent locations
Correct Answer: B
PS 1.2
When is obtaining permission to use a copyrighted image NOT required?
A. when using images to develop design skills
B. when using images to promote a free event
C. when using images for a free public display
D. when creating images for educational institutions
Correct Answer: A
PS 1.3
Which three elements should be identified for every task on a project plan? (Choose three.)
A. cost
B. owner
C. software
D. due date
E. estimated hours
Correct Answer: BDE
PS 2.1
What resolution will the image(s) be saved at when using the Save for Web option?
A. 72 DPI
B. 96 DPI
C. 150 DPI
D. 300 DPI
Correct Answer: A
PS 2.2
Which two are related to the design principle of movement? (Choose two.)
A. focus
B. rhythm
C. harmony
D. symmetry
E. repetition
Correct Answer: BE
PS 2.4
Which three are best practices related to making color corrections with Photoshop? (Choose
three.)
A. work in CMYK mode
B. use adjustment layers
C. work with a calibrated and profiled monitor
D. downsample images to final resolution before color correction
E. touch up an image (remove dust spots, scratches, etc.) before making color corrections
Correct Answer: BCE
PS 2.5
What is one key feature to adjust when taking photos in environments with different lighting?
A. zoom
B. flash
C. resolution
D. megapixels
Correct Answer: B
PS 2.6
What is another term for raster graphics?
A. bitmap
B. line work
C. 3-D images
D. vector image
Correct Answer: A
PS 3.4
What is the most effective way to save snapshots of different versions of a graphic to show a client?
A. use Layer Comps
B. use Smart Filters
C. use Save As for different versions of the same graphic
D. export an animated GIF with the different versions of the graphic portrayed
Correct Answer: A
PS 3.5
Which menu option is selected to change the color mode of an image?
A. Color>Mode
B. Print>Mode
C. Image>Mode
D. Image>Color
Correct Answer: C
SIMULATION EXAMPLES
(right-click or command-click on Mac and save .jpg files on your computer to work on them)

PS 2.3
Set the anti-aliasing for the text to Crisp.
Method of Completion:
1. Click Window > Character
2. Click the drop-down menu for Anti-aliasing and set it to Crisp
PS 3.1
Using the mini-bridge, browse for items on the Desktop. (Note: Do not open any files.)
Method of Completion:
1. Click Window > Extension > Minibridge
2. Click Desktop
3. Click Browse Files
4. Click Desktop
PS 3.2

Create a mask using the selection on the layer named pet.
Method of Completion:
1. Click the layer named pet
2. Click Layer > Layer Mask > Reveal Selection
PS 3.3

Convert the file to CMYK as a U.S. Sheetfed Coated v2 and then save it for print production as a TIFF with LZW compression, Per Channel Pixel Order and IBM PC Byte Order.
Method of Completion:
1. Click Edit > Convert to Profile
2. Click the drop-down for Destination Space and select U.S. Sheetfed Coated v2
3. Click OK
4. Click File > Save As
5. Click the dropdown for Format and select TIFF
6. Click Save
7. Click LZW
8. Click the Per Channel button and click OK
9. Click the IBM PC button
10. Click OK
PS 4.1

Record the measurement of the width of the square on the stage.
Method of Completion:
1. Click Analysis > Ruler Tool
2. Click and drag from edge to edge across the width of the square to measure
3. Click Window > Measurement Log
4. In the Measurement Log Panel click Record Measurements
PS 4.3

Apply HDR toning to the image using the Saturated Preset.
Method of Completion:
1. Click Image > Adjustments > HDR Toning
2. Click the Preset drop-down menu and select Saturated
3. Click OK
PS 4.4

Increase the contrast of the image using non-destructive editing and the Curves Preset Medium Contrast (RGB).
Method of Completion:
1. In the Adjustments Panel, click the Curves Presets arrow to expand the Curves Presets list
2. Scroll down and click Medium Contrast (RGB)
PS 4.5

Duplicate the current layer, then set the new layer opacity to 60% and change it to a Hard Light Blending Mode.
Method of Completion:
1. Right-click the current layer and select Duplicate Layer
2. Click OK
3. Click in the Opacity text field and type 60%
4. Click the drop-down menu for Blending Mode and select Hard Light
PS 4.8

Remove the Drop Shadow style from the type layer named Pasture and then add the Bevel and Emboss style, setting the Size to 10 px and the Soften to 15 px. (Note: Accept all other default settings.)
Method of Completion:
1. Double-click the type layer named Pasture
2. In the Layer Style dialogue, uncheck Drop Shadow
3. Click the Bevels and Emboss style
4. Click and drag the Size slider to 10
5. Click and drag the Soften slider to 15
6. Click OK
PS 5.1

Resize the image, setting the width to 6 inches and the resolution to 200 pixels per inch. (Note: Accept all other default settings.)
Method of Completion:
1. Click Image > Image Size
2. Under Document Size, click the drop-down for units and select inches
3. Click in the text field for Width and Type 6
4. Click in the text field for Resolution and type 200
5. Click OK
Last modified: Friday, May 20, 2011, 10:59 AM